Ads 468x60px

Pages

Rabu, 08 Januari 2014

Download FxCamera 3 3 0 on a apk Format For Android

FxCamera is a free, easy and creative camera app. With over 30 filters to choose from,
we will assure you that every photo will turn out to be your favorite.
All of your photos taken can be shared amongst your friends and can you can interact
with people all over the world!

Voices from the media 
"You can get pretty creative with everything this app has to offer" makeuseof
"FxCamera is a must have camera- app for Android users!" andronavi

FxCamera apk for android

Share your photos
Can instantly share your photos through your FxCamera friends. Also, instant sharing through
Facebok and Twitter
-Tag all of your Photos
-Repost your friends photo
-Upload unlimited amounts of photos
-Comment and favor your friends photos

Read More About FxCamera 3.3.0 Apk >> https://play.google.com/store/apps/details?id=ymst.android.fxcamera


Download FxCamera 3.3.0 on a .apk Format | Alternatif Link

Read More..

Selasa, 07 Januari 2014

How to Root Nexus 7 2013 Mobile on Android 4 4 1 KOT49E KitKat and Install CWM TWRP Recovery

Google has just started rolling out Android 4.4.1 Kitkat update with build version KOT49E for the LTE version of the Nexus 7 (2013). The new official update is currently available as an Over-The-Air (OTA) update.

Note: You can manually download the OTA for the Nexus 7 (2013) LTE directly from Googles Update Servers and follow our step-by-step guide to install the update manually.

Nexus 7 (2013) LTE users who have already updated their devices with Android 4.4.1 KOT49E KitKat, may root their devices using the tutorial below.

Disclaimer: Rooting voids the warranty of your device. We and the developer of this rooting procedures shall not be held responsible if any undesirable outcomes may happen to your device. use of this root guide is solely at your own risk!

Pre-requisites
1. Make a backup of all your important data before following the guide.
2. Enable USB Debugging Mode on the tablet. Go to Settings >> About Phone. Tap on Build Number several times till the message shows "You are now a Developer". Exit from "About Phone" and find the "Developer Options" settings. Enable USB debugging.
3. The Nexus 7 bootloader should be unlocked.
4. Ensure the battery of the tablet is charged more than 80 percent.
5. The CWM/TWRP Recovery and SuperSU files compatible only with the LTE version of Nexus 7 (2013). Applying these on any incorrect variant will brick the device. Verify the model number of the Nexus 7 by navigating to Settings >> About Phone.

Files Required
1. Android SDK
2. Fastboot
3. CWM or TWRP Recovery
4. SuperSU (UPDATE-SuperSU-v1.75.zip) or the latest version

Steps to Root Nexus 7 (2013) LTE Running on Android 4.4.1 KOT49E KitKat and Install CWM/TWRP Recovery
Step 1: Install the Android SDK. The package includes the necessary drivers for connecting your tablet to the computer, which is mandatory for the rooting process.
Step 2: Extract the Fastboot .zip file using winrar/7zip/winzip or any other extracting tool and copy it to the android-sdk-windowsplatform-tools directory on the computer.
Step 4: Copy the CWM or TWRP .img file to the android-sdk-windowsplatform-tools directory on the computer.
Step 5: Connect the Nexus 7 to the computer using USB cable. Then copy the SuperSU .zip file to the SD card of your tablet.
Step 6: Switch off the Nexus 7. Then boot the device into fastboot mode by pressing and holding Volume Up, Volume Down, and Power buttons together.
Step 7: Navigate to android-sdk-windowsplatform-tools directory and open Command Prompt (Shift + Right-click >> Open Command Prompt). Then run the following command:

fastboot flash recovery recovery-clockwork-touch-6.0.4.4-deb.img

Step 8: Once completed, choose RECOVERY from the Fastboot menu and enter Recovery Mode.
Step 9: In CWM Recovery, select "install zip from sdcard" and then select "choose zip from sdcard". Now, navigate to the SuperSU .zip file that you copied earlier and confirm the installation by selecting Yes.
Step 10: Once the installation process completes, return to main recovery menu and select "reboot system now".

Nexus 7 (2013) LTE running on Android 4.4.1 KOT49E KitKat is now rooted successfully. Open the app drawer of the Nexus 7 and look for an app called SuperSU. Verify the root status of the device by downloading Root Checker app from Google Play Store.

Click here to know How to Update Nexus 7 (2013) Mobile with Android 4.4.1 KOT49E KitKat.
Read More..

Mushroom War 1 1 Android

Mushroom War 1.1 (Android)Current Version: 1.1
Requires Android: 2.1 and up
Category: Arcade & Action
V1.1 update: First release!

Overview:
Insanely addictive defense game!

Suffering from long time war, the kingdom of mushroom starts to collapse. An epidemic broke out and many mushrooms died from it and they were totally exhausted. A wave of evil thoughts and viruses spread among the mushrooms. After all, infected new species began its existence and there was a conflict between good and evil mushrooms. Your mission is to defend mushroom kingdom
from evil infected mushrooms. Please save your mushroom friend!

[Features]
- Absorbing 60 stages.
- Simple and easy operations.
- A lot of strategies to beat enemies
- Insanely addictive game play.

[How to play]
- Save weapon point and organize mushroom troop to defend from infected mushrooms.
- You can upgrade weapons, units and capacity of weapon point by upgrading buildings.

[Unit introduction]
- short distance units: Fist, ninja and mercenary mushroom
- long distance units: Archer, wizard and crossbow mushroom
- protect units : Shield, cavalry and big shield mushroom

Mushroom War 1.1 (Android) Mushroom War 1.1 (Android) Mushroom War 1.1 (Android)

Download:

http://www.filesonic.com/file/EBeby8r/Mushroom_War_1.1.apk
Read More..

Minggu, 05 Januari 2014

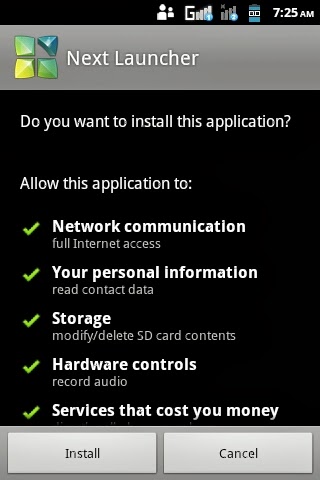
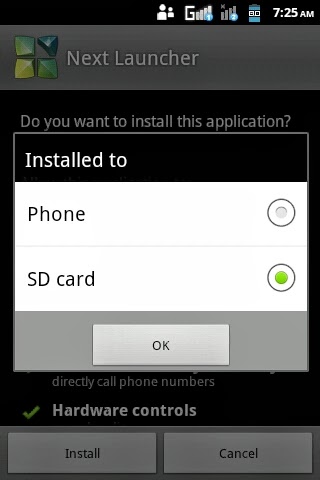
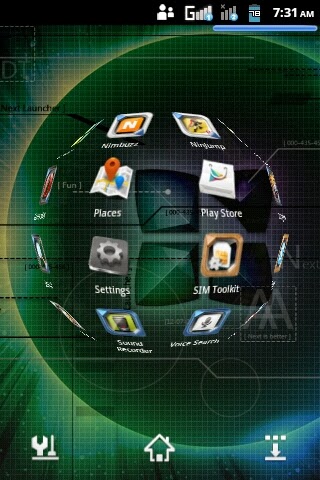
Next launcher 3D free download android


Everyday As a new many launcher   is coming to play store  . Go, Nova Apex many of the popular launcher . Next Launcher 3D is just another popular launcher . Next Launcher 3D is the popular launcher in the android launcher . Many people use Next Launcher 3D they were know how is it . 

How To install   : 


1. click the file & install 


2. than ok .


3. installing running 


screenshot  :


Features :
1. You can easily use the rotation supported icon . 
2. Unlimited layout of the screen
3. New and interesting effects on the screen
4. Easily add and resize widgets on the screen of the opportunity 
5. Also available in the app drawer and customizable .
6. Effect of different types of scrolling app drawer
7. Have a 3D launcher with widget


Download :      Next launcher 3D


Read More..

Sabtu, 04 Januari 2014

Walking About With A Talking Android

Walking About With A Talking Android

1 Walking About With a Talking Android

I have long relied on spoken directions from Google Maps on the desktop. As I access more and more of my online world through my Android phone, Googles recent announcement of GMM4.5 enhanced with walking directions means that I now have superior functionality to what I have enjoyed at my desk --- but now with the added benefit of having it all in my pocket!

Inclusion of step-by-step walking directions on Android now allows me to specify a destination on my TalkBack enabledeyes-free Android device, and have these spoken to me as I walk. But wait, theres more!

Were launching a new member of our Eyes-Free family of programs for Android --- WalkyTalky that goes hand-in-hand with spoken walking directions from Google Maps to better navigate the physical world. In addition,application Intersection Explorer allows me to explore the layout of streets using touch before venturing out with WalkyTalky.

1.1 WalkyTalky

WalkyTalky is an Android application that speaks the address of nearby locations as you pass them. It also provides more direct access to the walking directions component of Google Maps. With WalkyTalky installed, you can:

  • Launch WalkyTalky to specify a destination,
  • Either specify the destination by address, or pick from favorites or recently visited locations,
  • And in addition to spoken walking directions,
  • Hear street addresses as you walk by.

These spoken updates, in conjunction with the walking directions that are spoken by Google Maps help me navigate the physical world as efficiently as I navigate the Internet.

1.2 Intersection Explorer

Often, I like exploring a neighborhood to learn the layout of the streets before actually venturing out with my trusty companion,Hubbell Labrador, and this is where Intersection Explorer comes into its own. Using this application, I can explore any neighborhood on Google Maps via touch exploration.

1.2.1 How It Works

  • Intersection Explorer starts off at the users current location.
  • One can change the start position by entering an address, to do this, press menu and click on new location.
  • Once the map has loaded, touching the screen speaks the streets at the nearest intersection.
  • Moving ones finger along a compass direction, and then tracing a circle speaks each street at that intersection along with the associated compass direction.
  • Presence of streets is cued by a slight vibration as one traces the circle.
  • Lifting up the finger when on a street moves in that direction to the next intersection, speaks the distance moved, and finally speaks the newly arrived-at intersection.

1.3 Summary

Together, Intersection Explorer and WalkyTalky, in conjunction with Walking Directions from Google Maps brings a new level ofaccess to my physical world. I use these tools in conjunction with other Maps-based applications such as the Places Directory on Android --- this is another application from the Google Maps team that works fluently with TalkBack on Android to help me find nearby attractions or other locations of interest.

So next time you take your trusty Android out for a walk, make sure to give these new tools a spin --- you can report back on your experience via our Eyes-Free Group.

Applications WalkyTalky and Intersection Explorer can be downloaded from the Android Market.Share And Enjoy, and as usual, remember, The Best Is Yet To Come!

Author: T.V Raman

Date: 2010-09-09 Thu

HTML generated by org-mode 7.01 in emacs 24


QR Code for WalkyTalky:
QR code for WalkyTalky


QR Code for Intersection Explorer:
QR code for Intersection Explorer

Read More..

How to Root Galaxy S3 I9300 on Android 4 3 Jelly Bean Firmware

The International version of Samsung Galaxy S3 with model number GT-I9300 has received Android 4.3 Jelly Bean update firmware. The new official firmware is currently available as an Over-The-Air (OTA) update as well as through Samsung KIES.

Samsung Galaxy S3 I9300 users who have already updated their devices with Android 4.3 Jelly Bean, may root their devices using the tutorial below.

This tutorial uses CF-Auto-Root file released by Elite Recognized XDA Developers, Chainfire. The CF-Auto-Root file allowing Galaxy S3 users to root their devices easily without depending on the firmware. It completely supports Android 4.3 Jelly Bean and future firmware as well. Head over to the CF-Auto-Root main thread to learn more about the root method.

Disclaimer: Rooting voids the warranty of your device. We and the developer of this rooting procedures shall not be held responsible if any undesirable outcomes may happen to your device. use of this root guide is solely at your own risk!

Pre-requisites
1. Install USB Drivers for Samsung Galaxy S3 on the computer.
2. Enable USB Debugging Mode on the phone by navigating to Settings >> Developer Options.
3. Make a backup of all your important data before following the guide.
4. The Galaxy S3 should be factory unlocked and not locked to any particular carrier.
5. Ensure the battery of the phone is charged more than 80 percent.
6. The CF-Auto-Root file works only on the international version of Samsung Galaxy S3 (GT-I9300). Applying this to any incorrect variant might brick the device. Verify the model number of the Galaxy S3 by navigating to Settings >> About Phone.

File Required
1. CF-Auto-Root for Galaxy S3 I9300 (CF-Auto-Root-m0-m0xx-gti9300.zip)
2. Odin 3.07

Steps to Root Galaxy S3 I9300 Running on Android 4.3 Jelly Bean Firmware
Step 1: Extract CF-Auto-Root and Odin 3.07 files using winrar/7zip/winzip or any other extracting tool.
Step 2: Switch off the Galaxy S3. Then boot the device into Download Mode by pressing and holding Volume Down, Home and Power buttons together until a construction Android robot icon with a warning triangle appears on screen. Now press the Volume Up button to enter Download Mode.
Step 3: Launch Odin on the computer as an Administrator.
Step 4: Connect the Galaxy S3 to the computer using USB cable while it is in the Download Mode. Wait until Odin detects the device. When the device is connected successfully, the ID: COM box will turn to light blue with the COM port number. Additionally, the successful connected will be indicated by a message saying Added.

Note: If the Added message does not appear, then try re-install USB drivers or changing the port on the computer.

Step 5: In Odin, click the PDA button and select the CF-Auto-Root-m0-m0xx-gti9300.tar.md5 file.
Step 6: Verify that Auto Reboot and F. Reset Time checkboxes are selected in Odin. Also, ensure the Re-Partition option is NOT selected.
Step 7: Double-check and click Start in Odin. The installation process will now begin.
Step 8: Once the installation process is completed, your phone will restart and soon you will see a PASS message with green background in the left-most box at the very top of the Odin. You can now unplug the USB cable to disconnect your device from computer.

Samsung Galaxy S3 I9300 running on Android 4.3 Jelly Bean firmware is now rooted successfully. You can now install any app that requires root permission. Verify the root status of the device by downloading Root Checker app from Google Play Store.

Thanks to all fellas at XDA who first tried out this rooting technique. This method was originally posted via XDA-Developers original thread.

Click here to know How to Update Galaxy S3 I9300 with Android 4.3 Jelly Bean official firmware.
Read More..

Jumat, 03 Januari 2014

Audio Books On Android Thanks Librivox!

In my previous article , I alluded to an Audio Books application forAndroid. I did not go into much detail on the application itselfbecause I felt it deserved an article of its own.So heregoes!

In Praise Of Librivox

If you arent familiar with the Librivox project, please visit Librivox.org to see the wonderful work that that project is doing. Androidapplication AudioBooks brings the wonders of Librivoxto Android --- now, you can carry all 30,000 audio books andcounting in your pocket and access them anywhere .Here are some highlights:

  • Browse, and quickly play available audio books. You canbrowse by several criteria.
  • Books you listen to get downloaded to your device and areavailable for offline listening.
  • All books provide a table of contents, allowing you to jumpto a specific portion of a book.
  • 90% of the application user interface is completelyaccessible with TalkBack --- see below for missing accessfeatures.

The only glitche with using application AudioBooks with the Android Access API is that the player controls withinthe audio-book player are presently missing contentdescriptions --- this is Android-API speak to say that thecontrols are images with missing labels. So the first time youuse this app, youll need someone to tell you the buttons ---alternatively just experiment to discover theirfunctions. There are pause, play, rewind and forward buttons ---if the friendly folk who developed this application stumble uponthis post, please get in touch, and I can show you what you needto add to your code to make the eyes-free experience evensmoother.

Happy Listening --- And Share And Enjoy!

Read More..